| Excerpt |
|---|
This document introduces the demo project of "configure_network_demo", including how to configure the network in AP or STA modes. |
Content
IDE Preperation
Software
- Visual Studio 2010 SP1
- Slamware Windows SDK:Slamware Windows SDK
- RoboStudio(for map display):Robostudio installer
Sample Code:
Info Higher version of Visual Studio will cause errors. Sometime you will need to upgrade SP1 package to make your VS compatable with .Net Framework.
Hardware
(Either one of following)
- Slamware SDP mini
- Slamware SDP
- Slamware Kit
- Zeus/Apollo robot base
Download
Compiling
- Right click on "configure_network_demo" project, set as StartUp project.
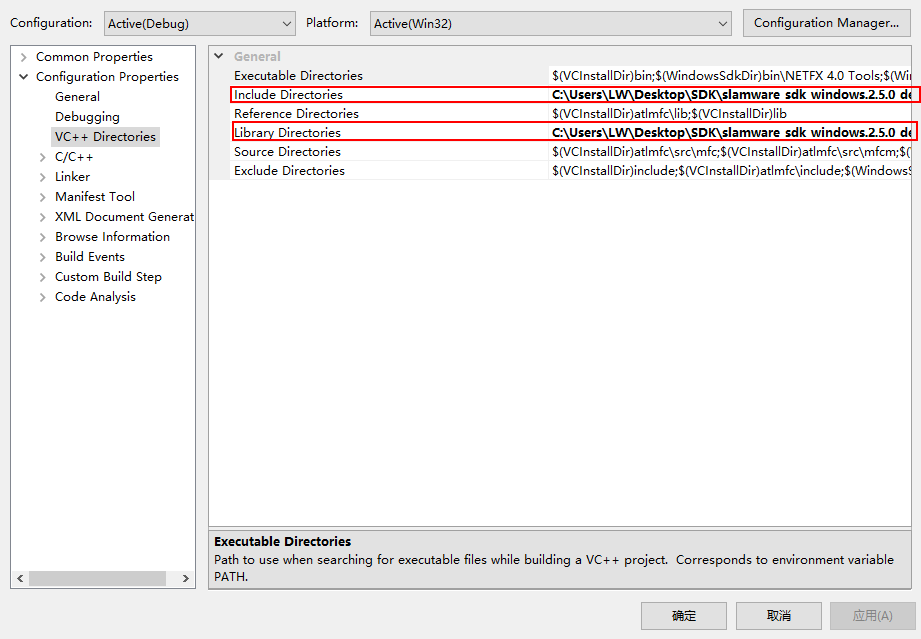
Right click on " configure_network_demo ", then " Properties",configure "include" and "lib" directories to the corresponding folder path of Slamware SDK.
Info It's not necessary to copy files to the project directory, user will only need to configure the path of SDK.
- Right click on " configure_network_demo ", then "properties",set "Command Arguments" as follows:
Syntax :
configure_network_demo [OPTS] <SDP IP Address>
slamware_address The ip address string of the SLAMWARE SDP.
AP Configurate network in AP mode.
STA Configurate network in STA mode.
--disable-dhcp disable dhcp.
--enable-dhcp enable dhcp.
--disable-wifi disable wifi
-h Show this message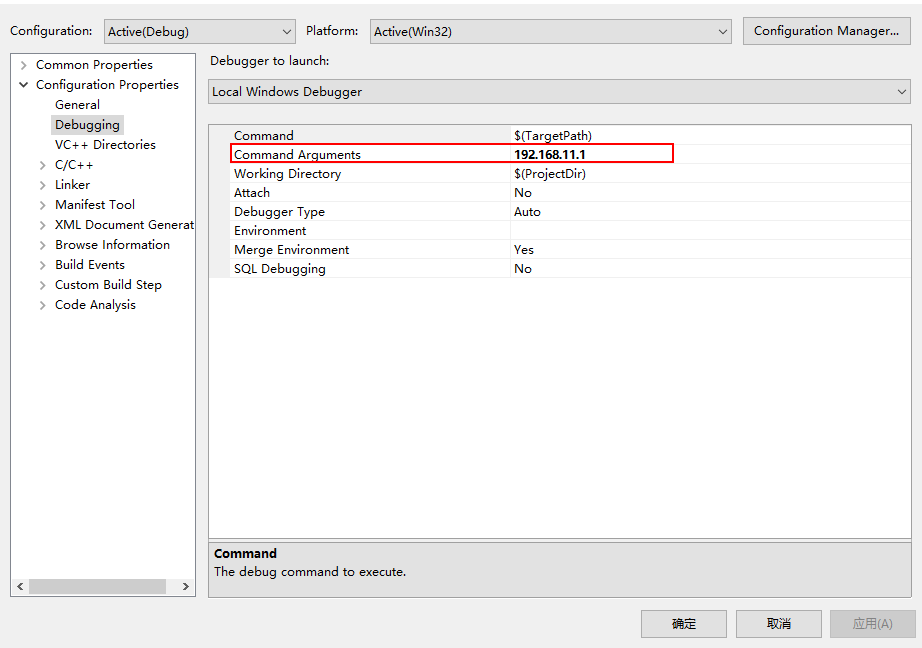
- Click " F5" to execute.
- Configure in AP and STA modes
- AP mode:
After configuration, the wifi name(SSID), password, IP address, channel will become the value set in the figure below.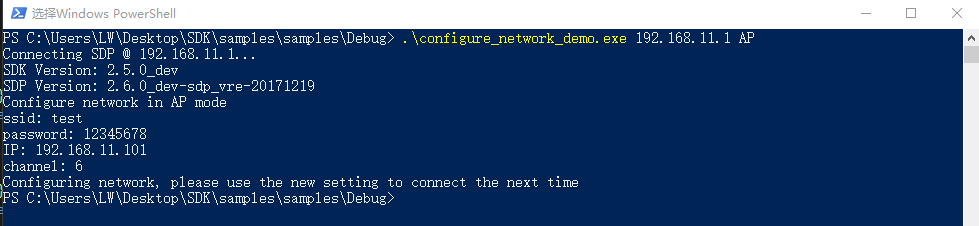
Verification: After reconnecting the slamware AP with SSID: test and password: 12345678, the slamware module can be connected with 192.168.11.101 (192.168.11.1 is still available as the default).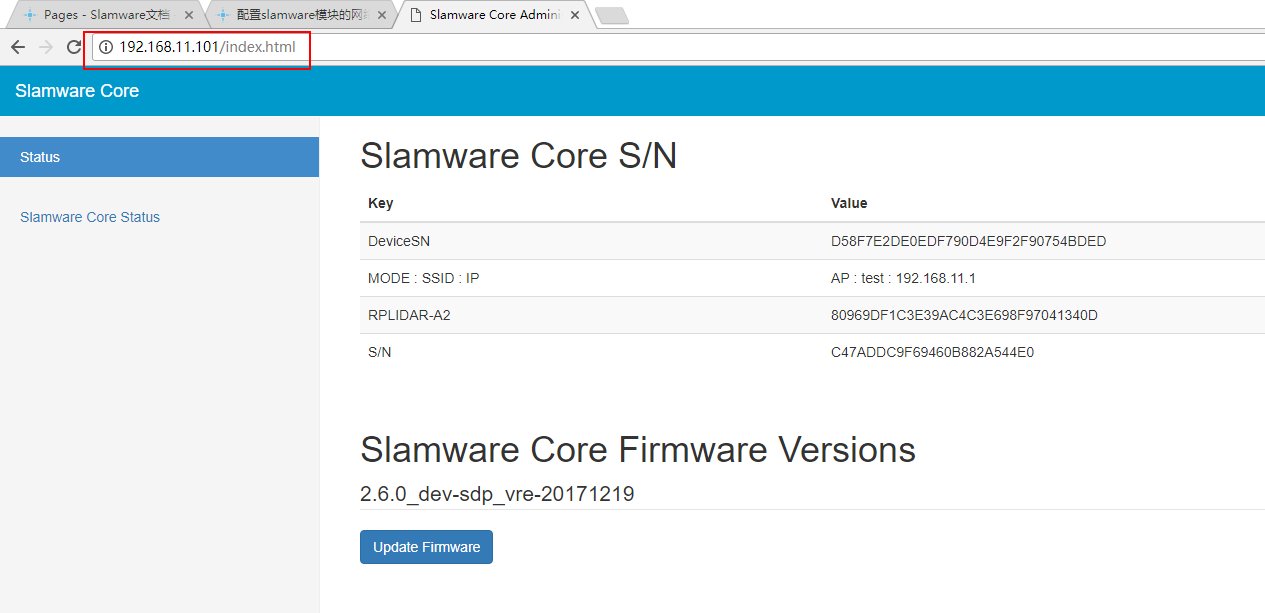
And the WiFi channel has been changed to 6: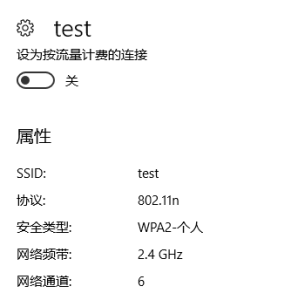
- STA mode:
Please input the SSID and password of the a available LAN. After completion, the robot will access the LAN and can be connected with the IP allocated by the robot.

Verification: The slamware module can be accessed by connecting the client to the same LAN. In the figure below, the IP address assigned by the robot is 10.0.129.75.
Similarly, you can use commands as described above to disable/enable DHCP, disable WIFI.
Code
- AP mode
| Code Block | ||||||||
|---|---|---|---|---|---|---|---|---|
| ||||||||
std::map<std::string, std::string> options; options["ssid"] = "test"; options["password"] = "12345678"; // password length should surpass 8 options["ip"] = "192.168.11.101"; // do not use address from 192.168.11.1 to 192.168.11.100 (reserved for internal usage) options["channel"] = "6"; result = sdp.configurateNetwork(NetworkMode::NetworkModeAP, options); |
- STA mode
| Code Block | ||||||||
|---|---|---|---|---|---|---|---|---|
| ||||||||
std::map<std::string, std::string> options; options["ssid"] = ssid; options["password"] = password; result = sdp.configurateNetwork(NetworkMode::NetworkModeStation, options); |
- Disable/enable DHCP
| Code Block | ||||||||
|---|---|---|---|---|---|---|---|---|
| ||||||||
	    if (opt_enable_dhcp == true) {
			std::cout << "enable DHCP" << std::endl;
            options.clear();
			result = sdp.configurateNetwork(NetworkModeDHCPEnabled, options);
		}
		if (opt_disable_dhcp == true) {
			std::cout << "disable DHCP" << std::endl;
            options.clear();
			result = sdp.configurateNetwork(NetworkModeDHCPEnabled, options);
} |
- Disable WIFI
| Code Block | ||||||||
|---|---|---|---|---|---|---|---|---|
| ||||||||
		if (opt_disable_wifi == true) {
			std::cout << "disable wifi" << std::endl;
            options.clear();
			result = sdp.configurateNetwork(NetworkMode::NetworkModeWifiDisabled, options);
} |